
Today we’re going to provide you with an ImageFramer tutorial that shows you how to create a border from scratch. We’ve created the exact same design using Photoshop in How to add a border in Photoshop but we’re going to make it even easier with ImageFramer.
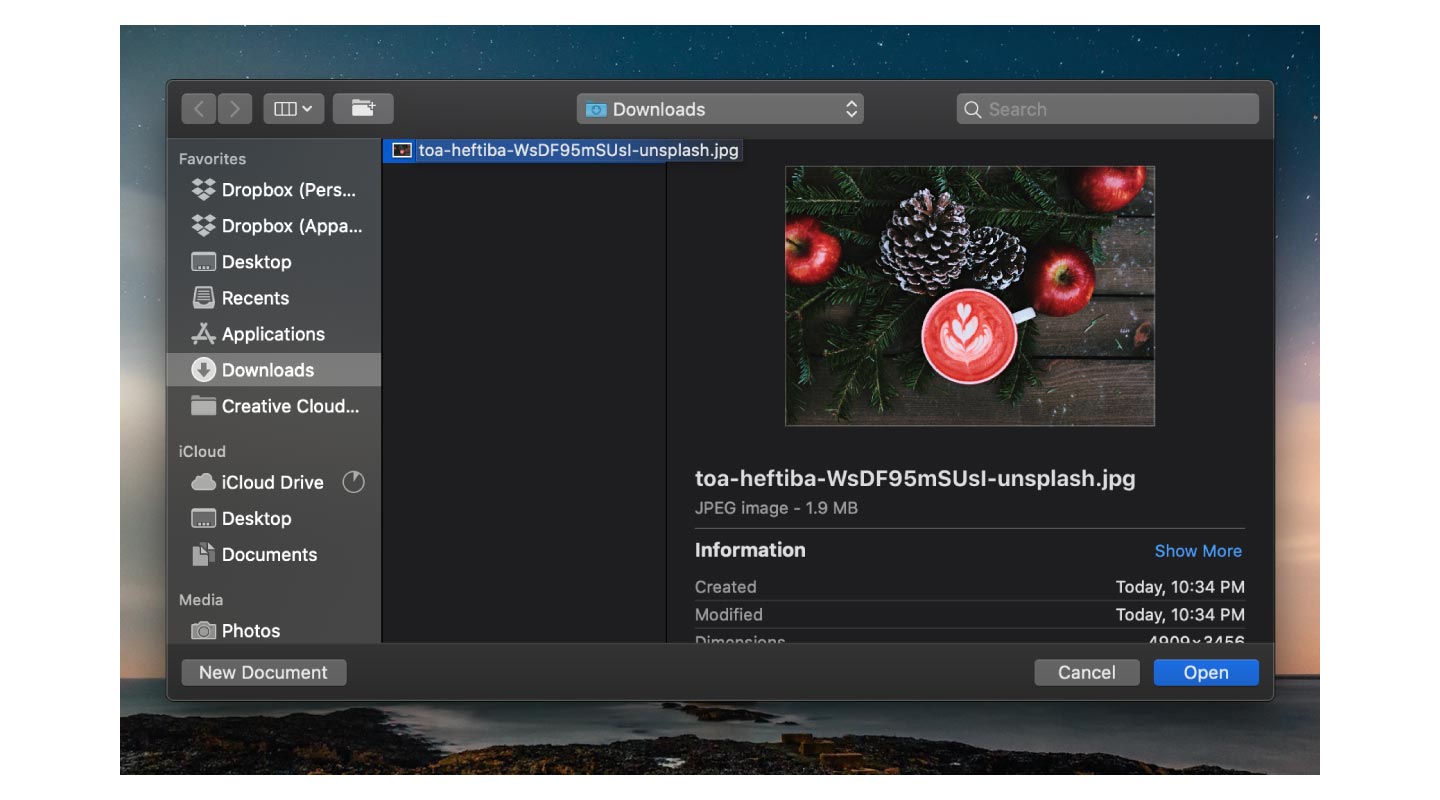
Launch ImageFramer and open your photo
In this tutorial, we’re going to use a winter-themed photo downloaded from Unsplash.
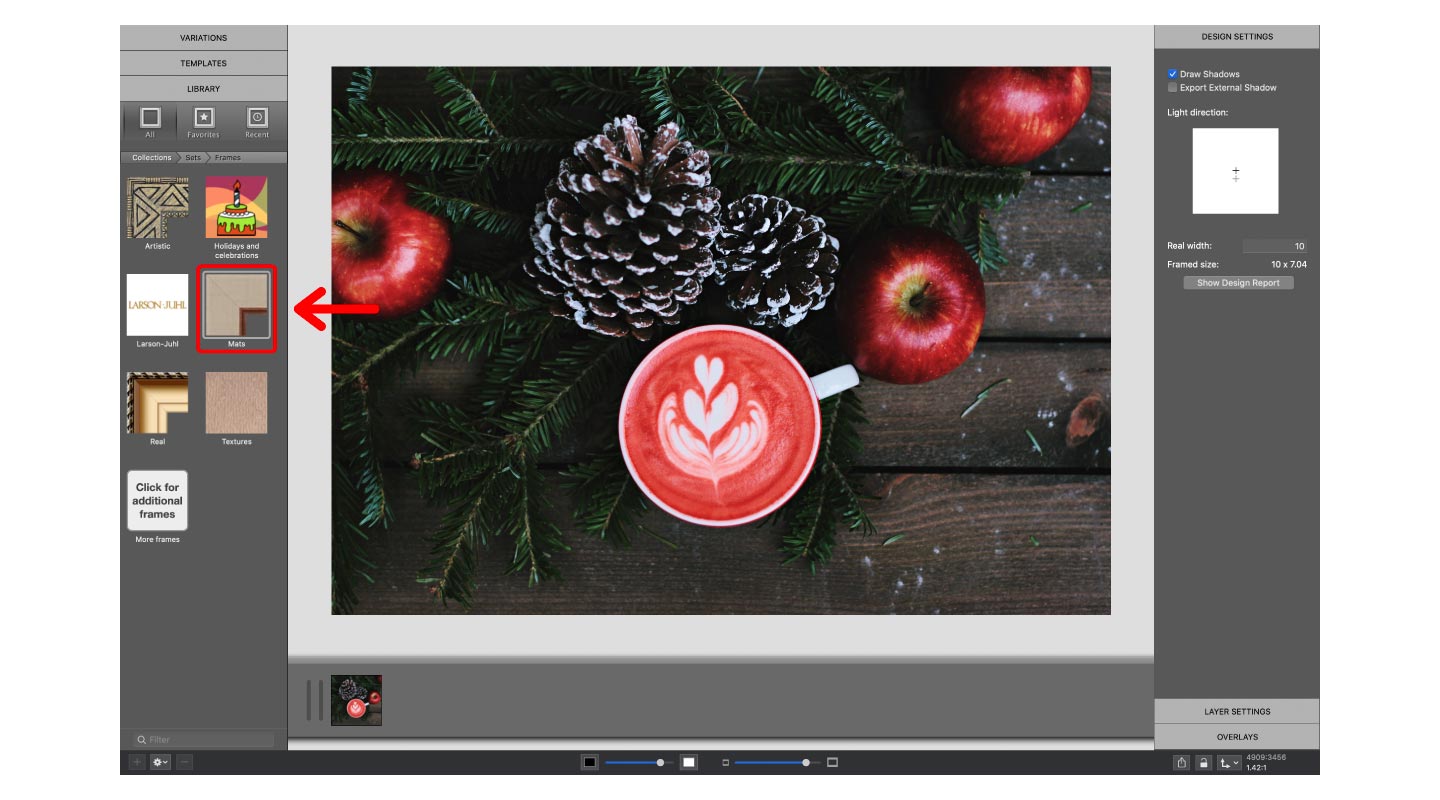
Open the Mats Collection
Navigate to the frame library on the left sidebar and select Mats.
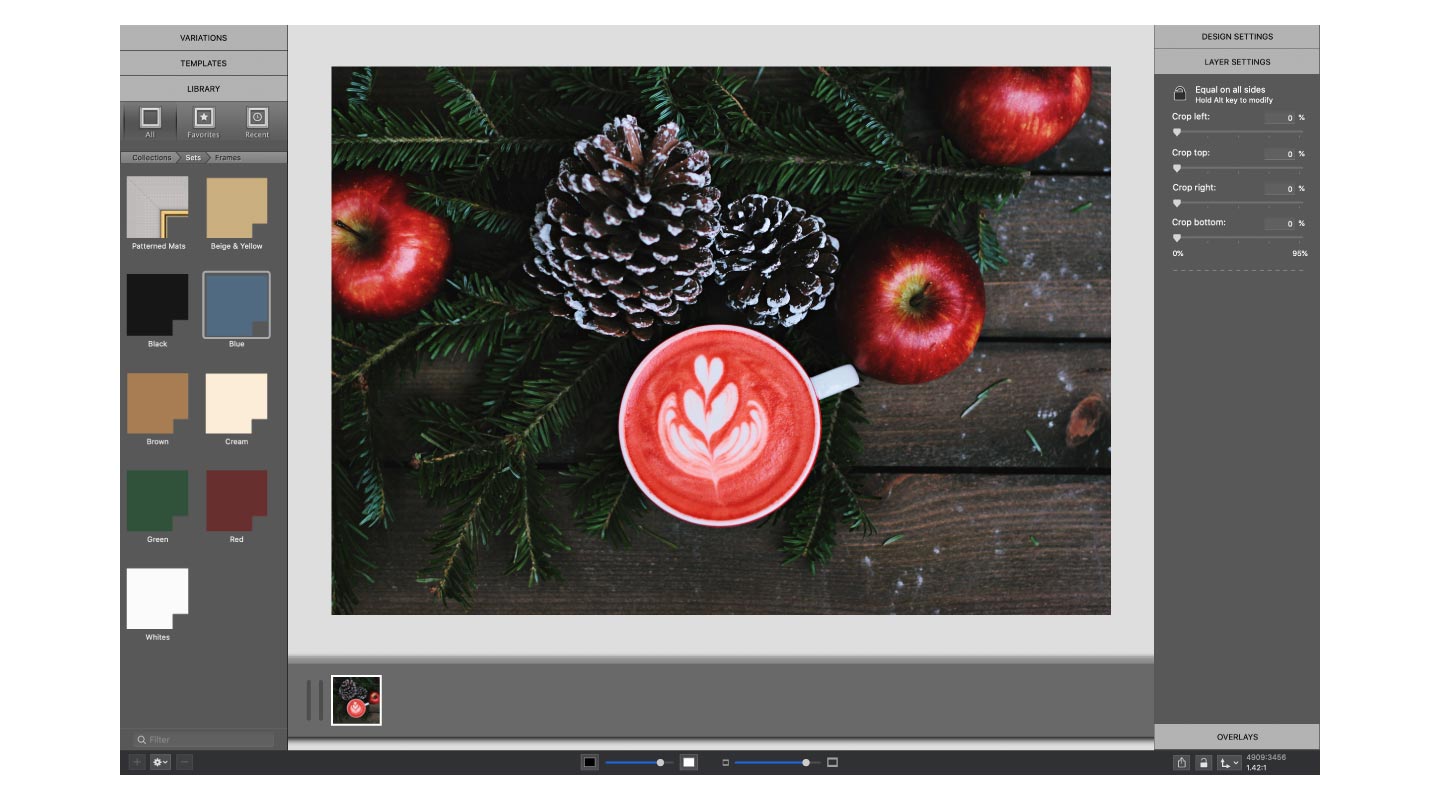
Choose a mat
Select a mat of your choice and don’t worry about the color. ImageFramer allows you to change the color of any mat you choose.
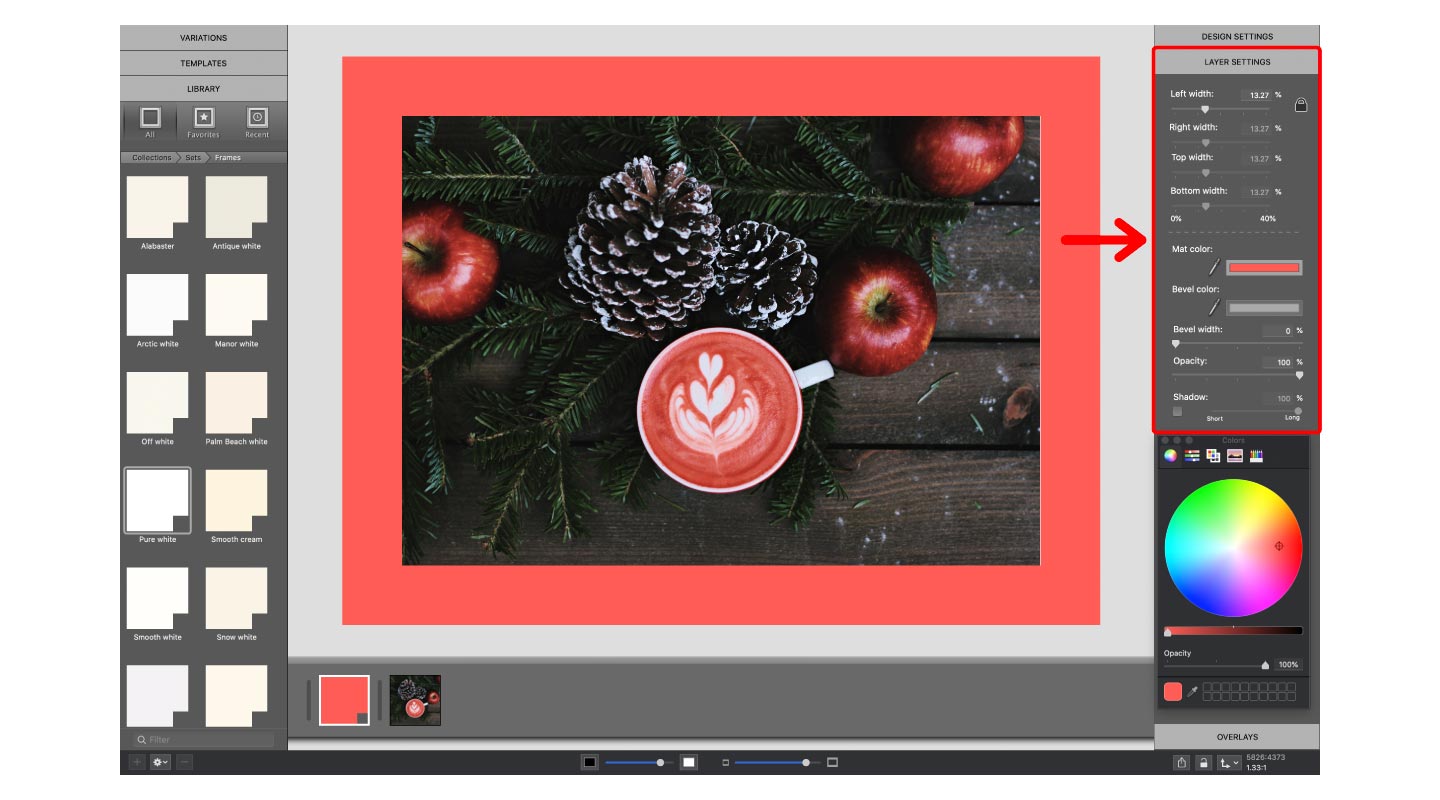
Adjust the Layer Settings
After you have chosen a mat, adjust the size, color, bevel and drop shadow.
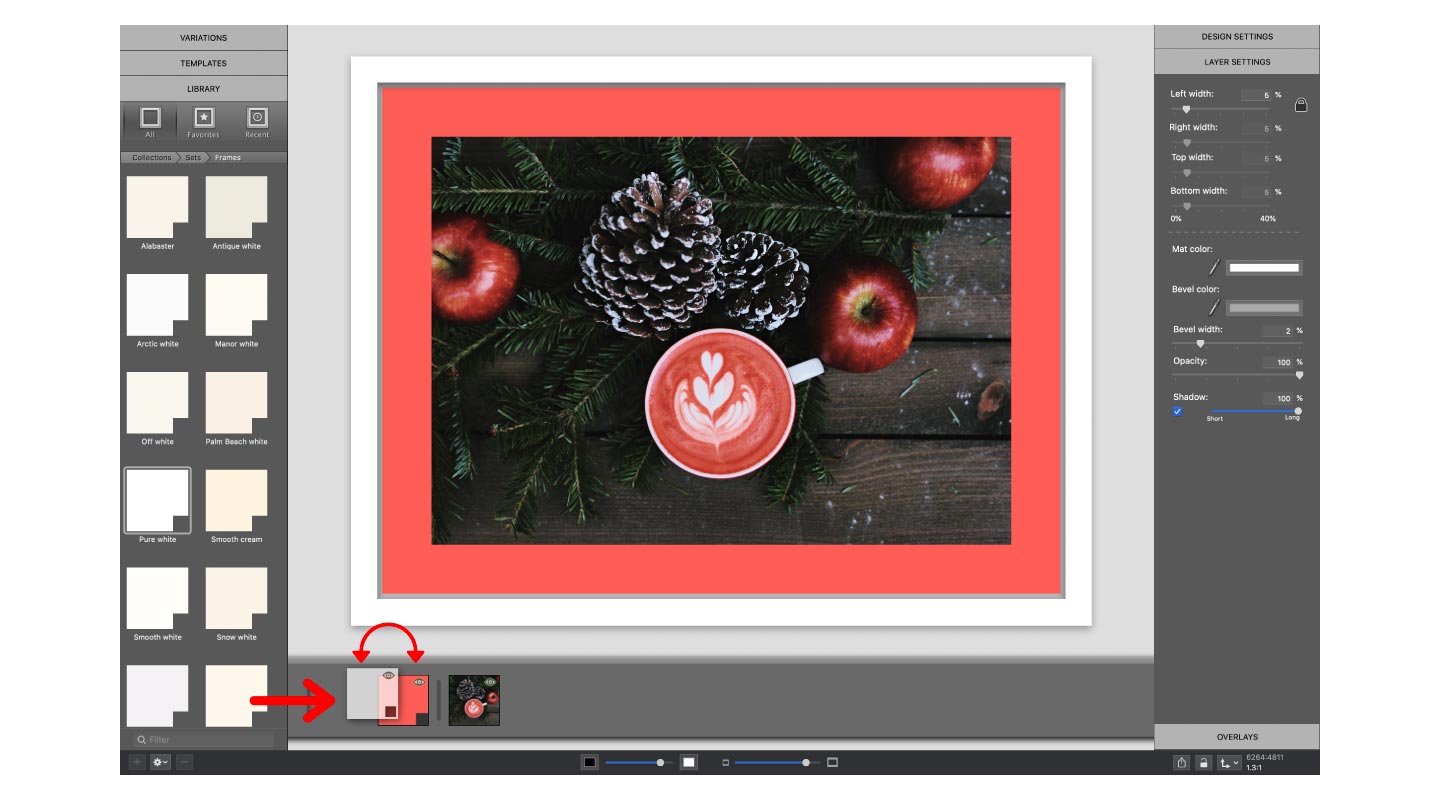
Add another mat
Once you’re happy with your settings, navigate to the left sidebar and select another mat. You can rearrange the order of your mats by moving them around in the Layers Filmstrip below your image.
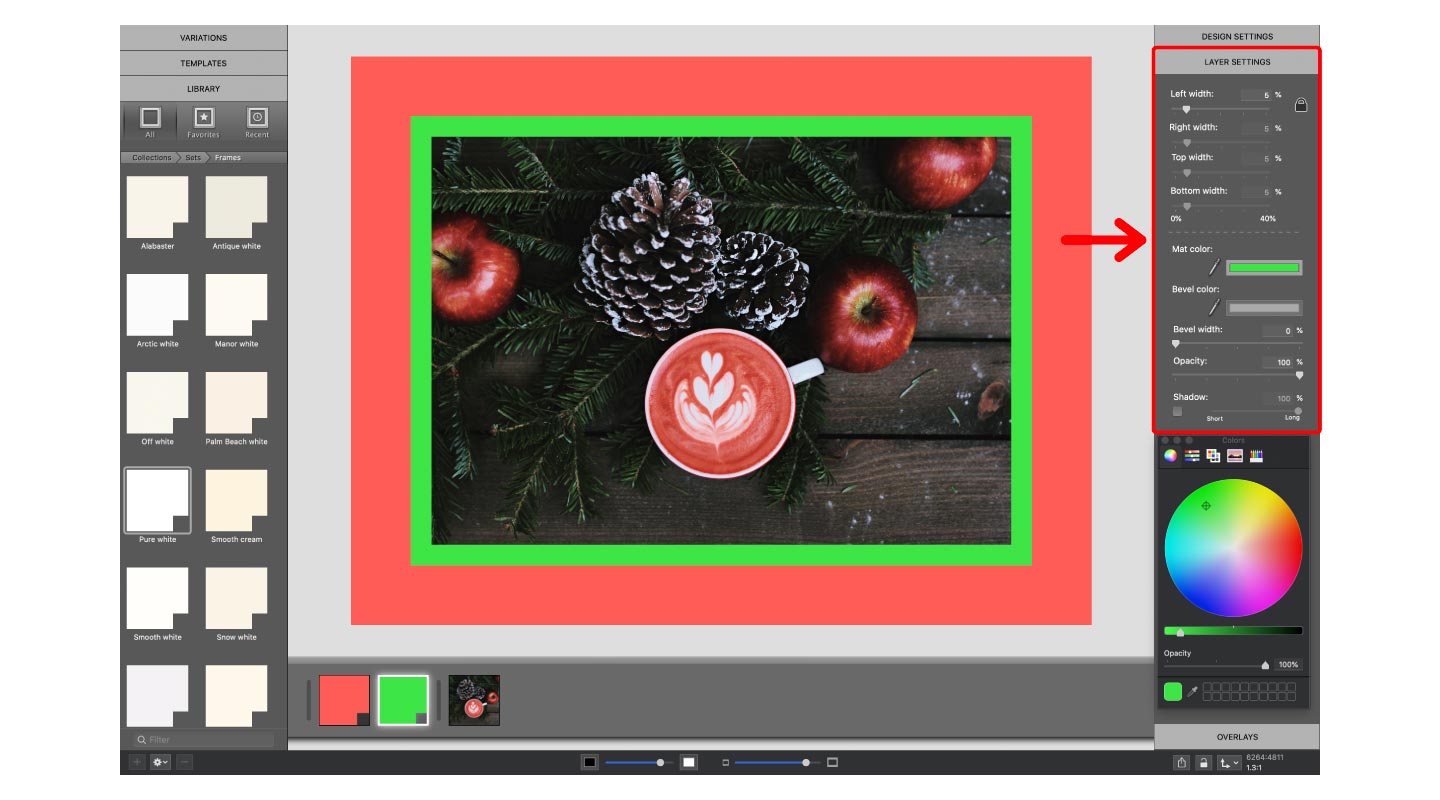
Adjust the Layer Settings
Once again, adjust the size, color, bevel and drop shadow of the new mat.
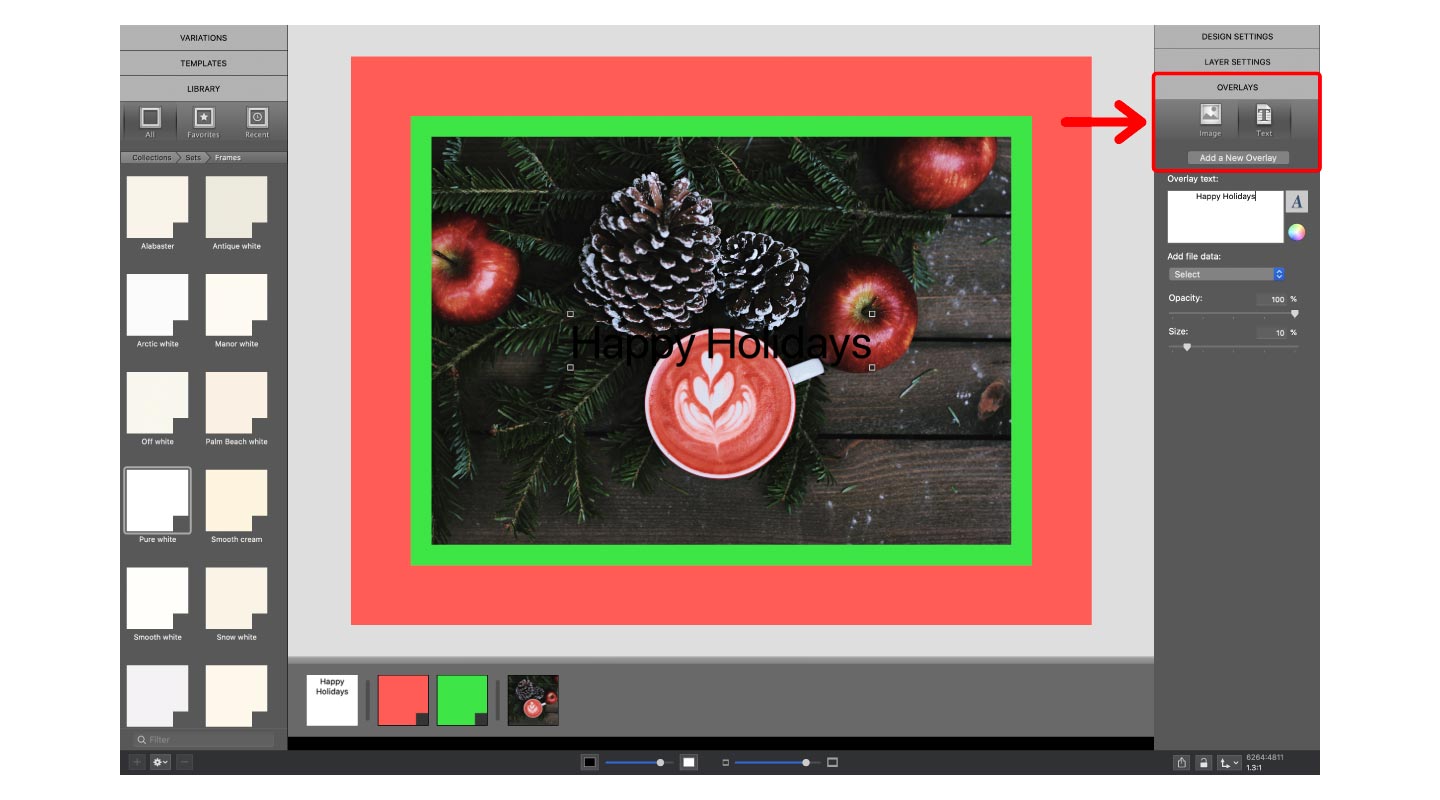
Add a Text Overlay
After you’re happy with your custom border, add some text to send a message! Click Overlays on the right sidebar, select the Text icon and click Add a New Overlay. You should see your text appear over your image.
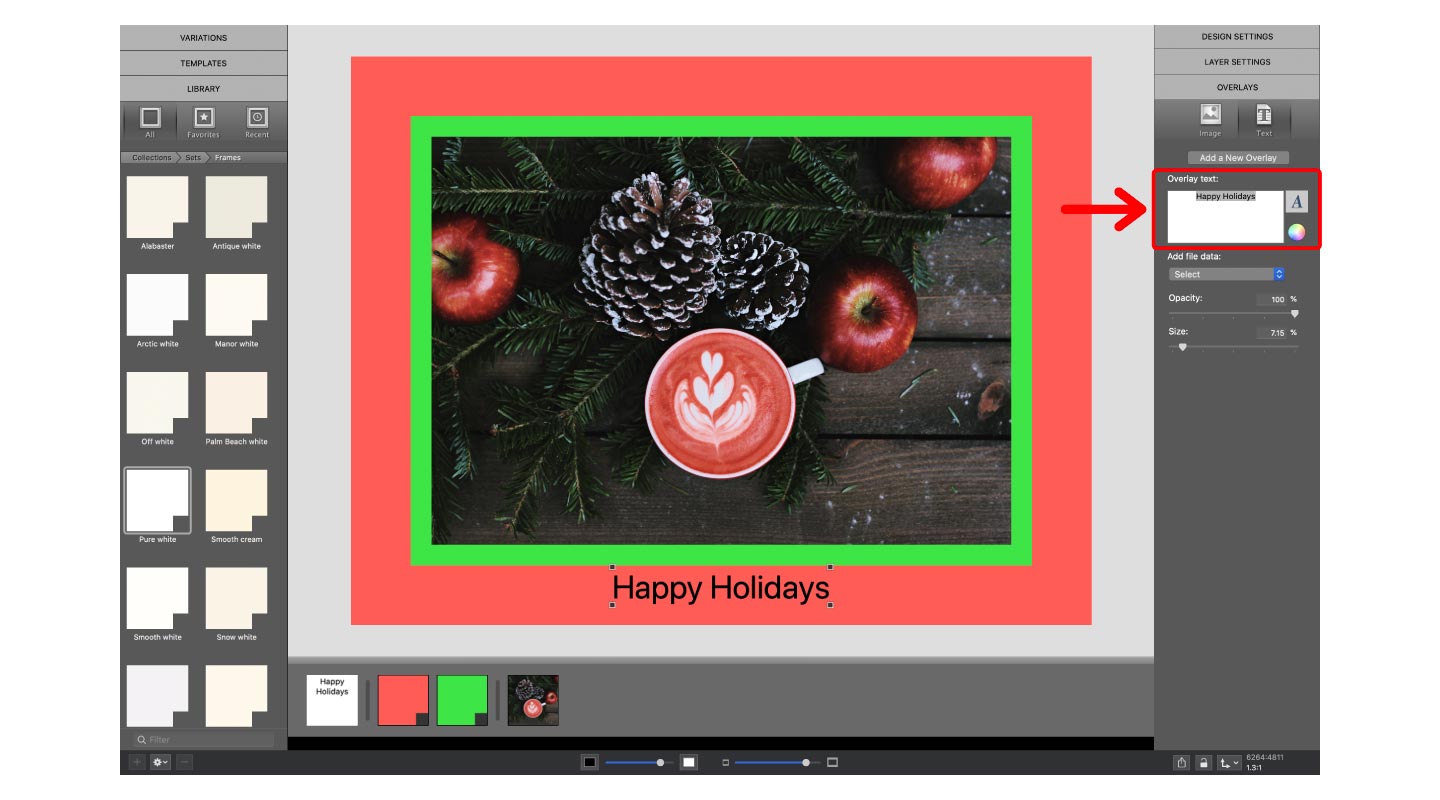
Type your message
Change your text by typing in the box on the right sidebar. Move the text to a location of your choice.
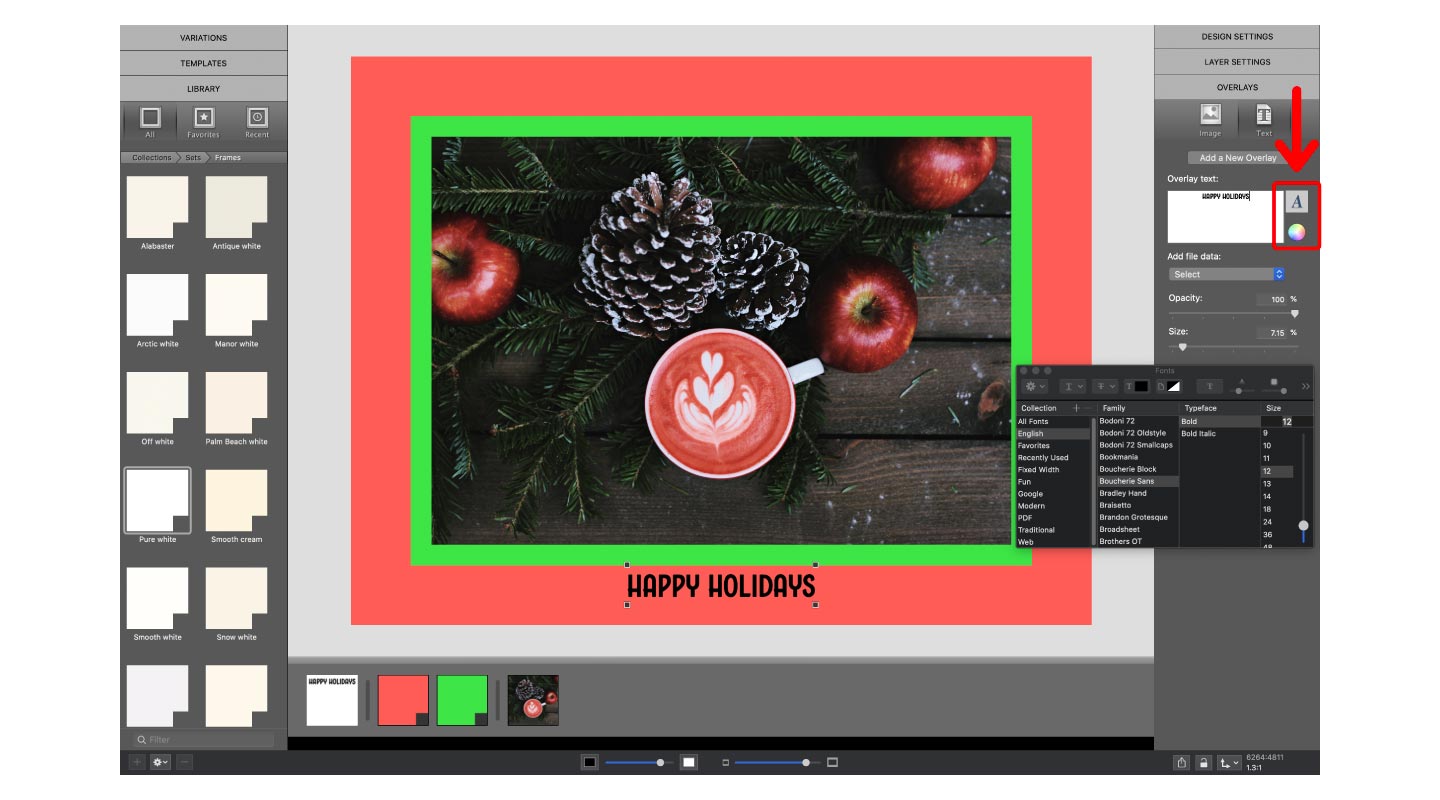
Edit the text
Change the font and color of your text by selecting the icons to the right of the text box.
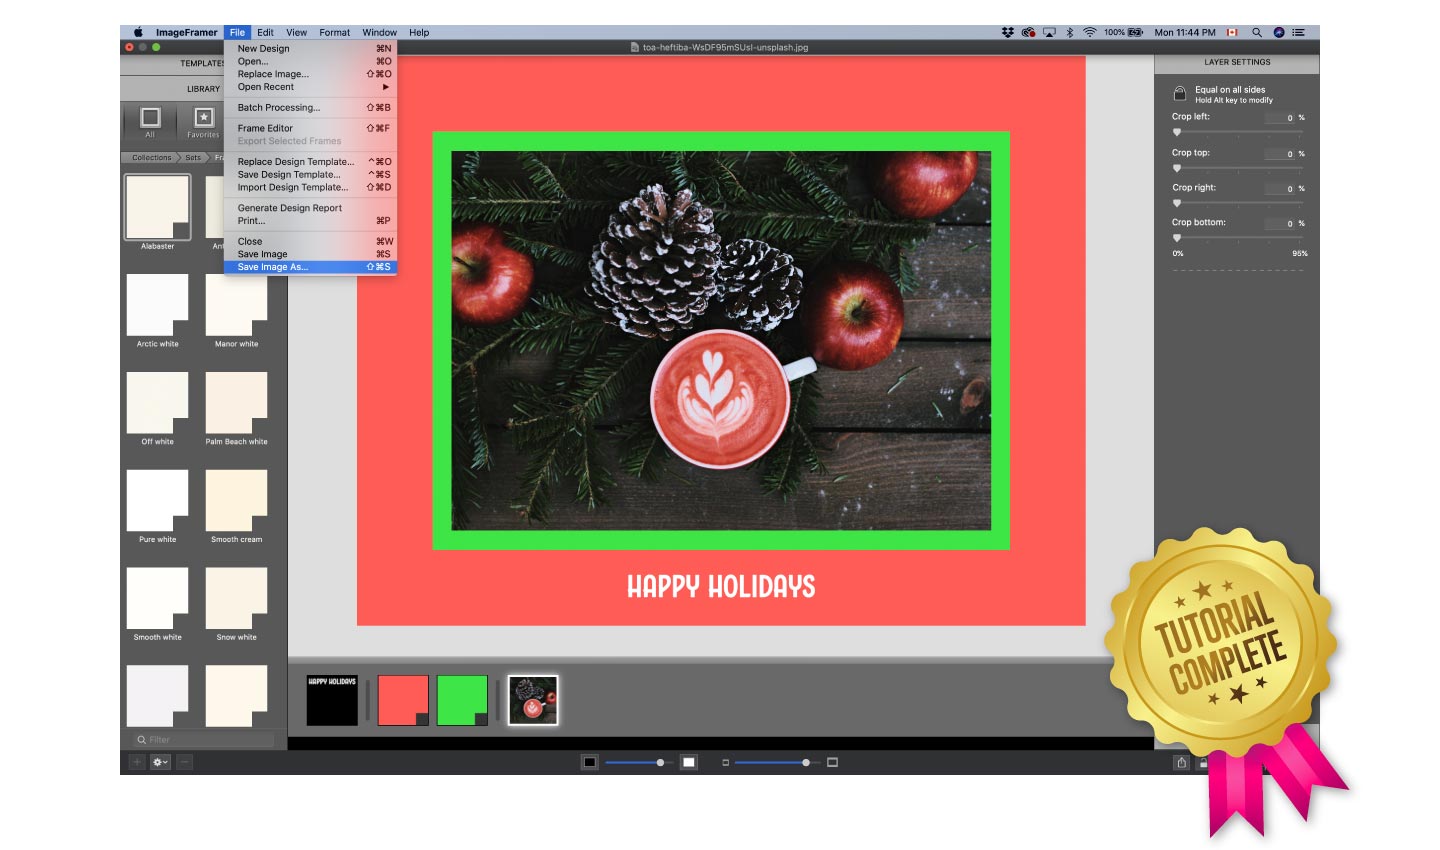
Save your work and share!
Make any final adjustments and then save your image in order to share it with friends and family!
Thank you for taking the time to participate in one of our tutorials. If you would like quick access to hundreds of great borders and frames you can find them in our macOS ImageFramer app.